

How to Create a Segment in Google Analytics
Gathering insights isn’t enough. To truly harness the power of the data of your Google Analytics dashboard, you need to leverage segmentation and drill down into your data.
In this post, you’ll learn three ways to create segments in Google Analytics to help you isolate and analyze your data to uncover opportunities.
![Download Now: Free Marketing Plan Template [Get Your Copy]](https://no-cache.hubspot.com/cta/default/53/aacfe6c7-71e6-4f49-979f-76099062afa0.png)
Table of Contents
- What is segmentation in Google Analytics?
- How to Create Segments in Google Analytics
- How to Build Custom Segments in Google Analytics
- How to Import Segments in Google Analytics from the Analytics Solutions Gallery
There are three ways to segment data in Google Analytics.
- You can apply “system segments” which are pre-defined segments available across all Google Analytics accounts.
- You can build custom segments that allow you to group and analyze your data for your specific use-cases.
- You can import a segment “template” from the Analytics Solutions Gallery.
The method you choose will depend on your unique use case. Knowing the level of customization you require and the complexity of your segment can help you make a decision.
We’ll explore these three methods below.
How to Create Segments in Google Analytics
Step 1: Login into your Google Analytics account.
Step 2: Navigate to the “reports” section on your dashboard.
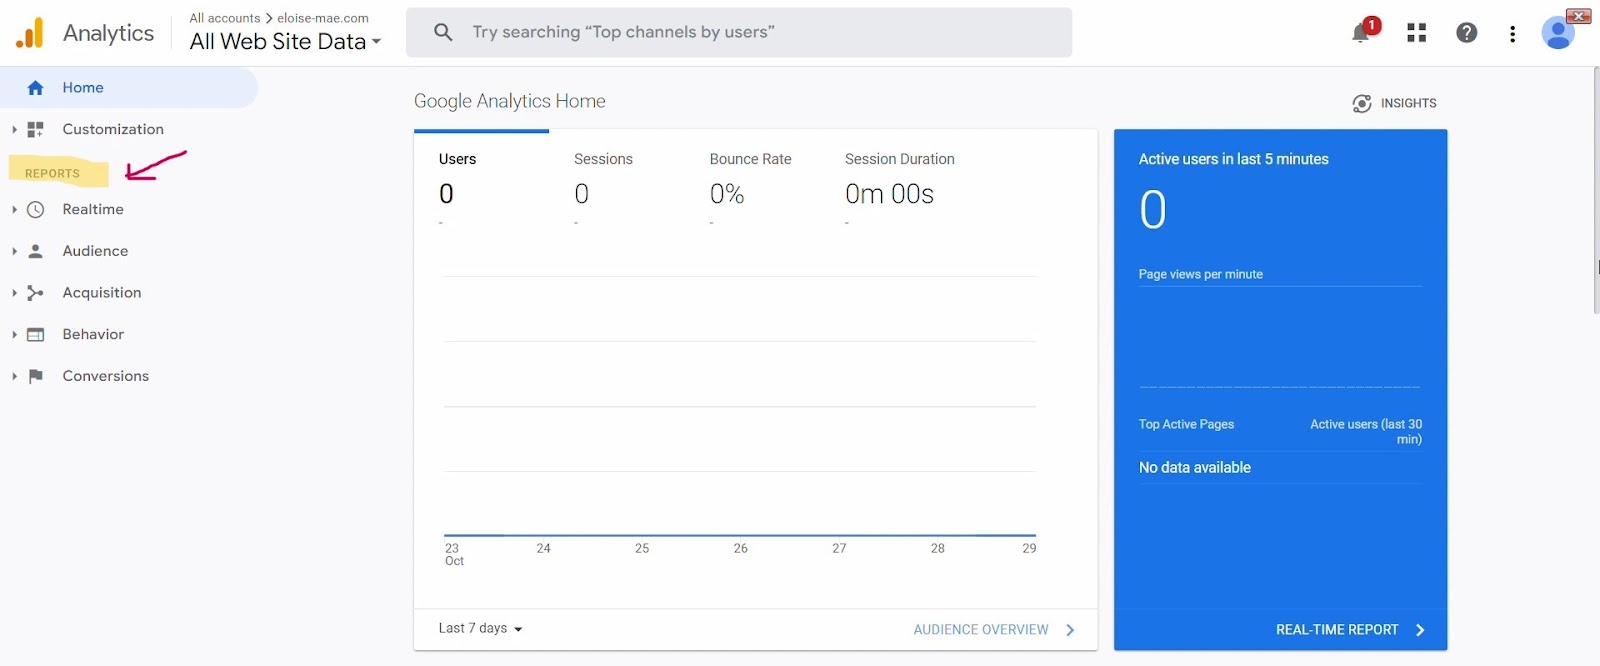
Under reports, you have five options:
- Realtime.
- Audience.
- Acquisition.
- Behavior.
- Conversions.
All options listed above can be used to create segments; however, for this tutorial, let’s create a segment based on the “audience” report.
Step 3: Click on “audience” which will prompt a dropdown menu. From the dropdown menu, click on “overview.”
Note: A segment can also be created from the other options listed in the drop-down menu.
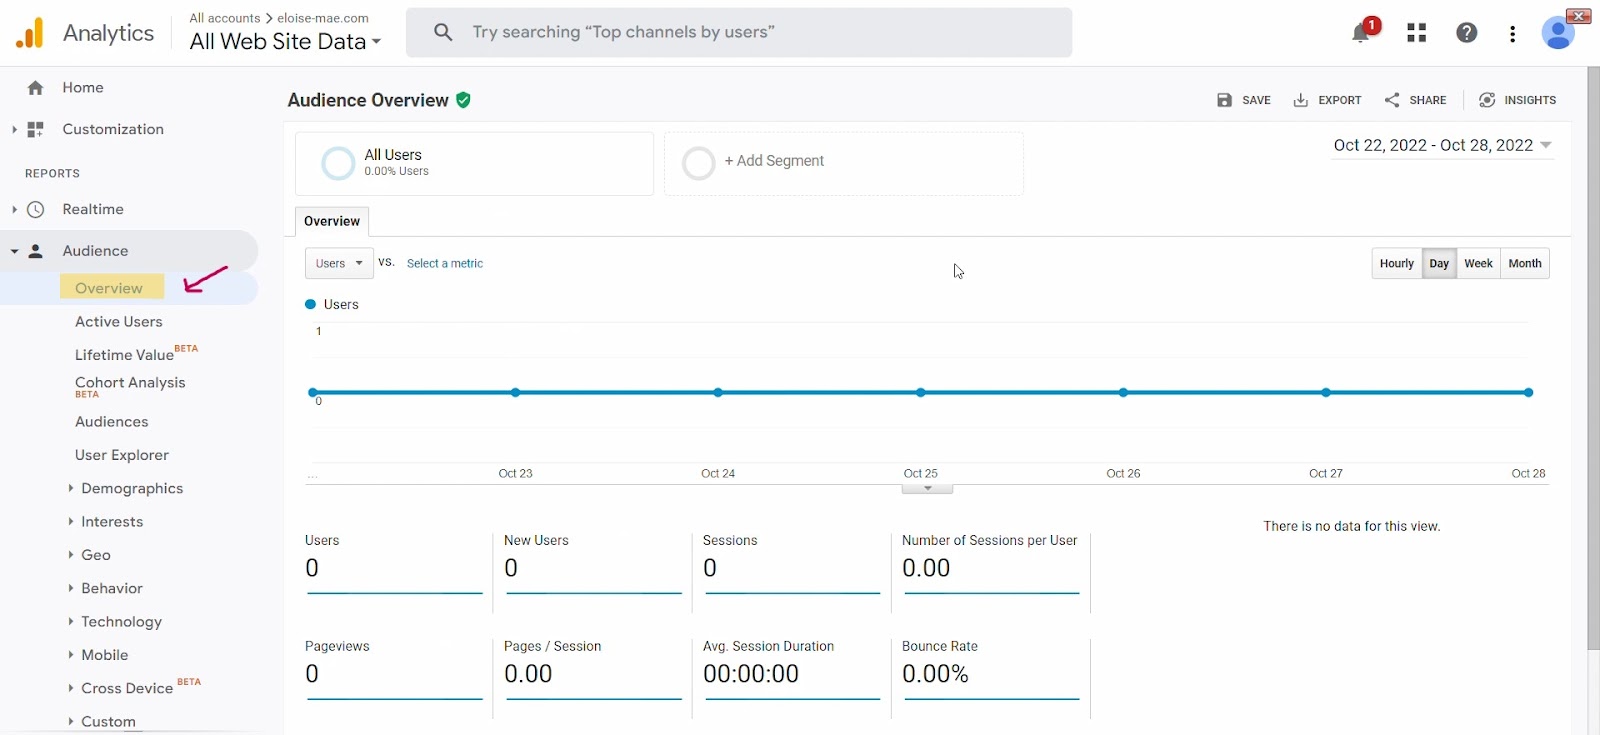
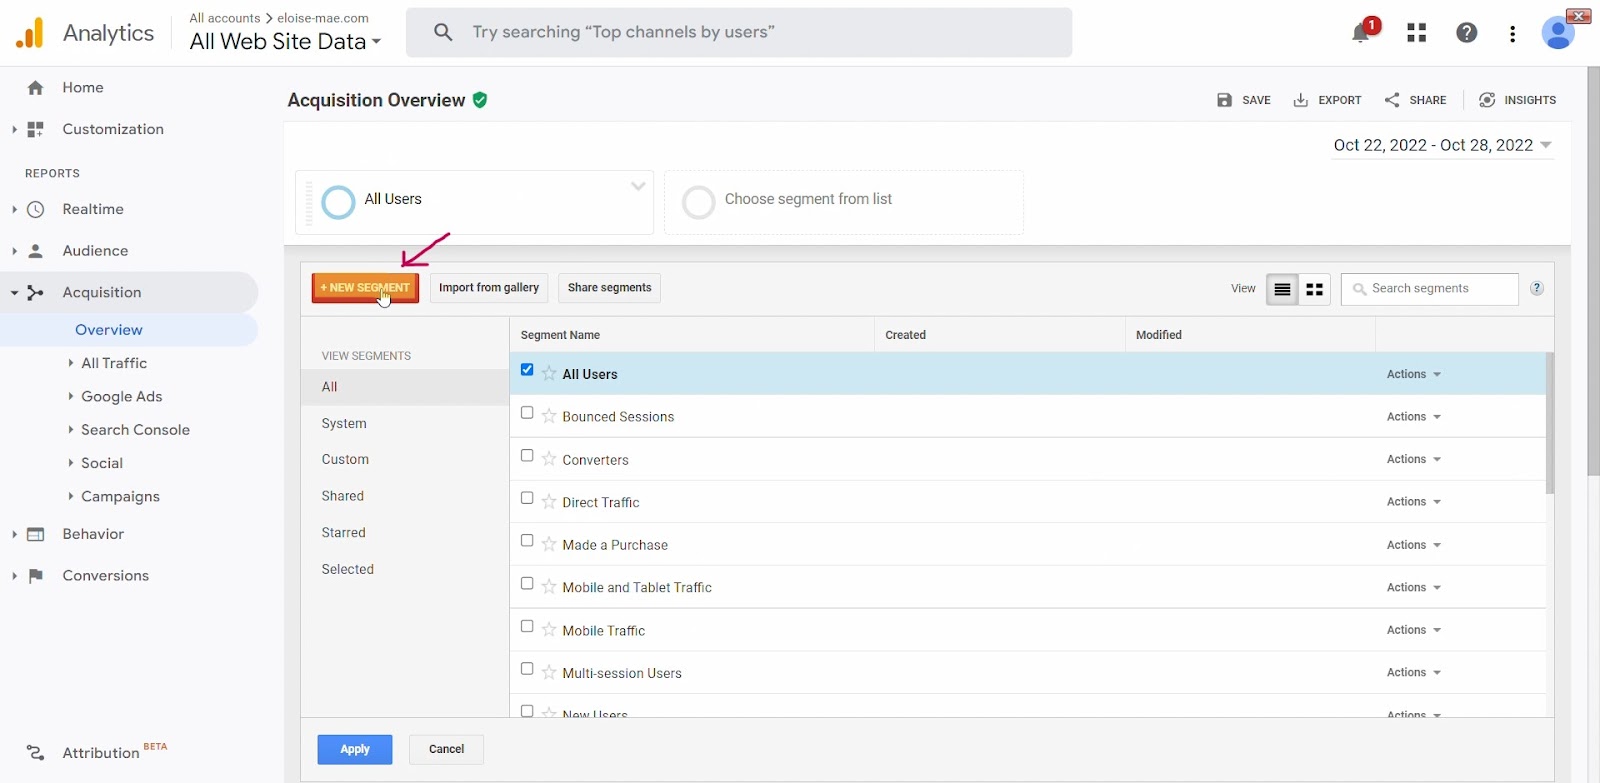
Step 4: Navigate to “Add segment” on the Audience Overview dashboard.

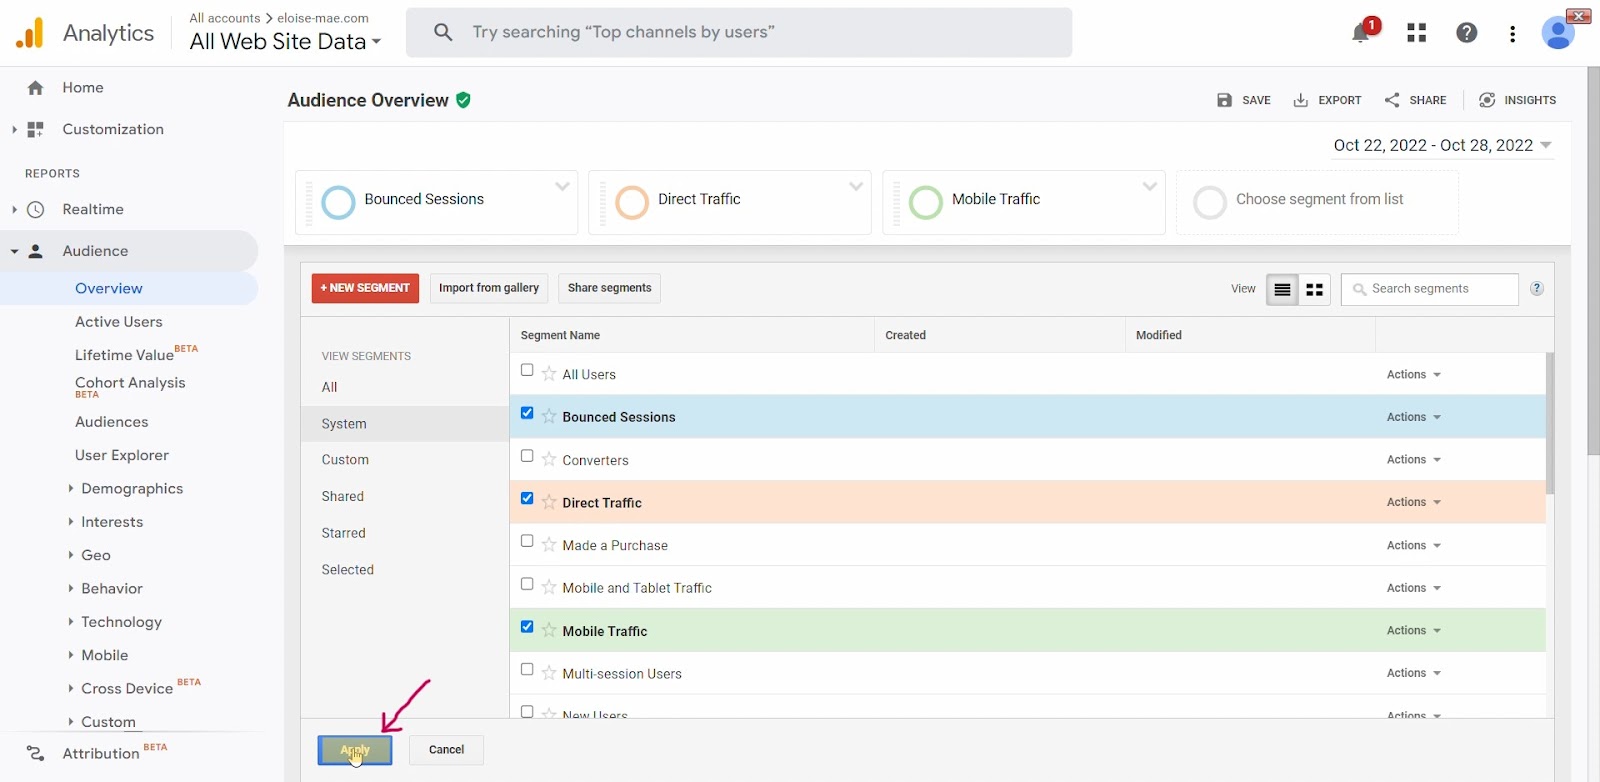
Step 5: Navigate to “system” under the “view segments” section and select which segment(s) you would like to apply.

Step 6: Once you’ve selected the segments you’d like to apply, click the “apply” button.
Step 7: You’ll be redirected to a new page that will display audience data that meets your segment criteria.

On this page, you have several options to analyze and filter through this data. You can compare metrics and analyze selected segments as a percentage of users (e.g. mobile traffic constituted X% of users).
And that’s it. You’ve just built your first report using pre-defined system segments.
If you’d like to create segments that are customized to your unique purposes, here’s how to build custom segments.
How to Build Custom Segments in Google Analytics
Step 1: Login into your Google Analytics account.
Step 2: Navigate to the “reports” section on your dashboard.
Under reports, you have five options:
- Realtime.
- Audience.
- Acquisition.
- Behavior.
- Conversions.
All options listed above can be used to create segments. However, for this tutorial, let’s create a custom segment based on the “Acquisition” report.
Step 3: Click on “acquisition” which will prompt a dropdown menu. From the dropdown menu, click on “overview.”
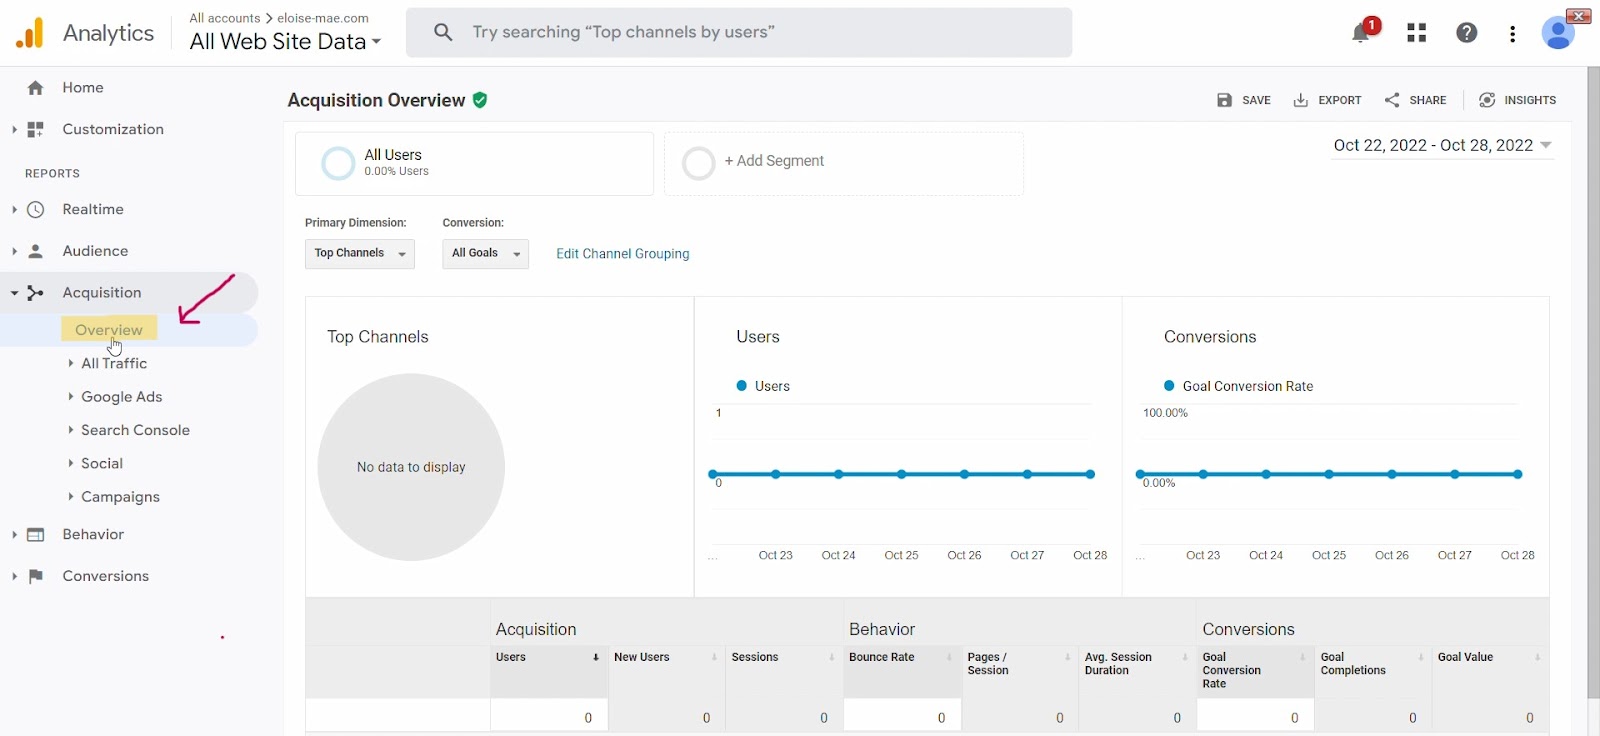
Step 4: Navigate to “Add segment” on the Acquisition Overview dashboard.

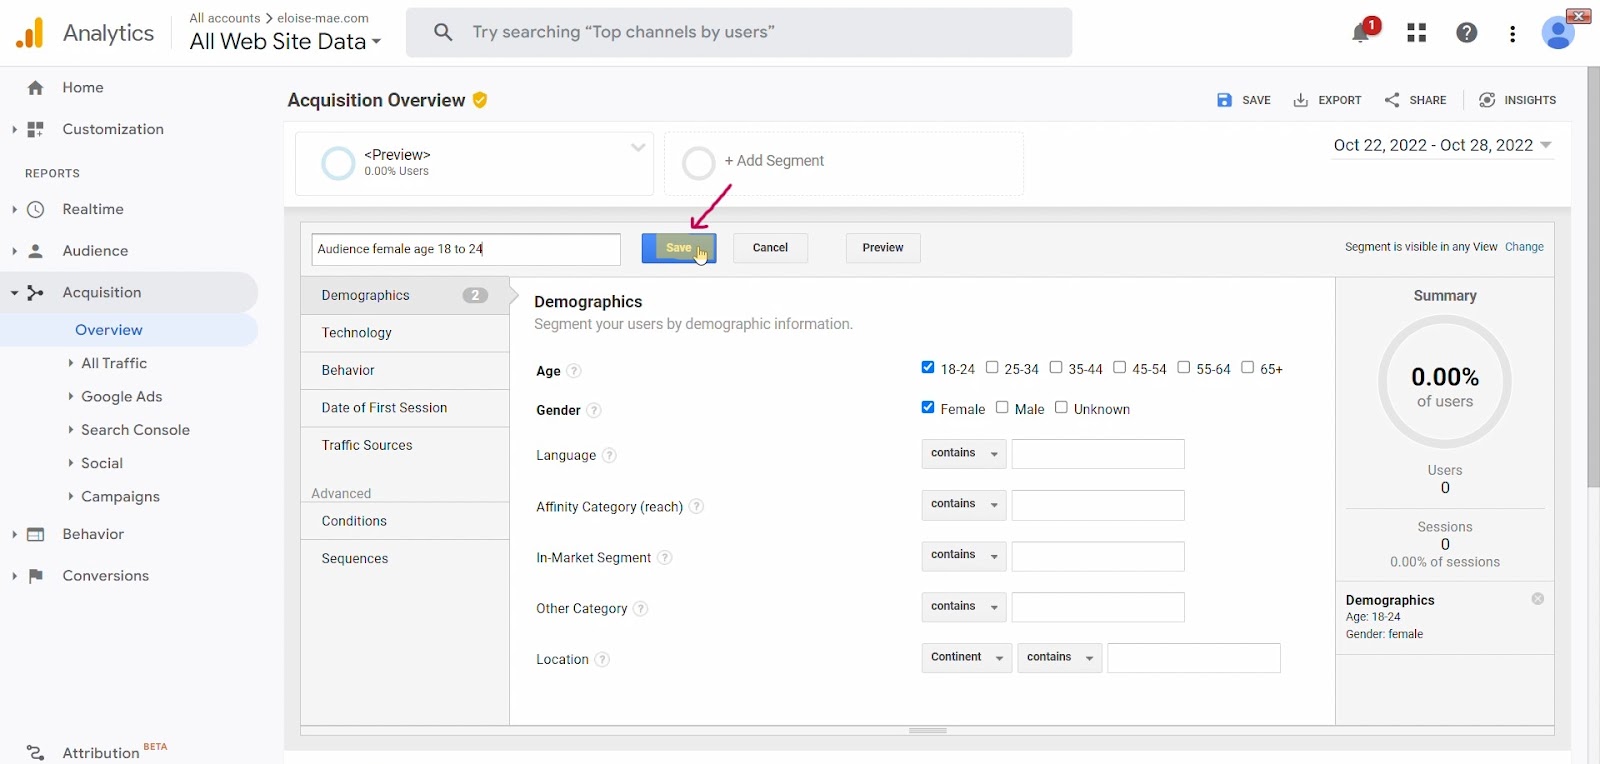
Step 5: Click on “New Segment.”
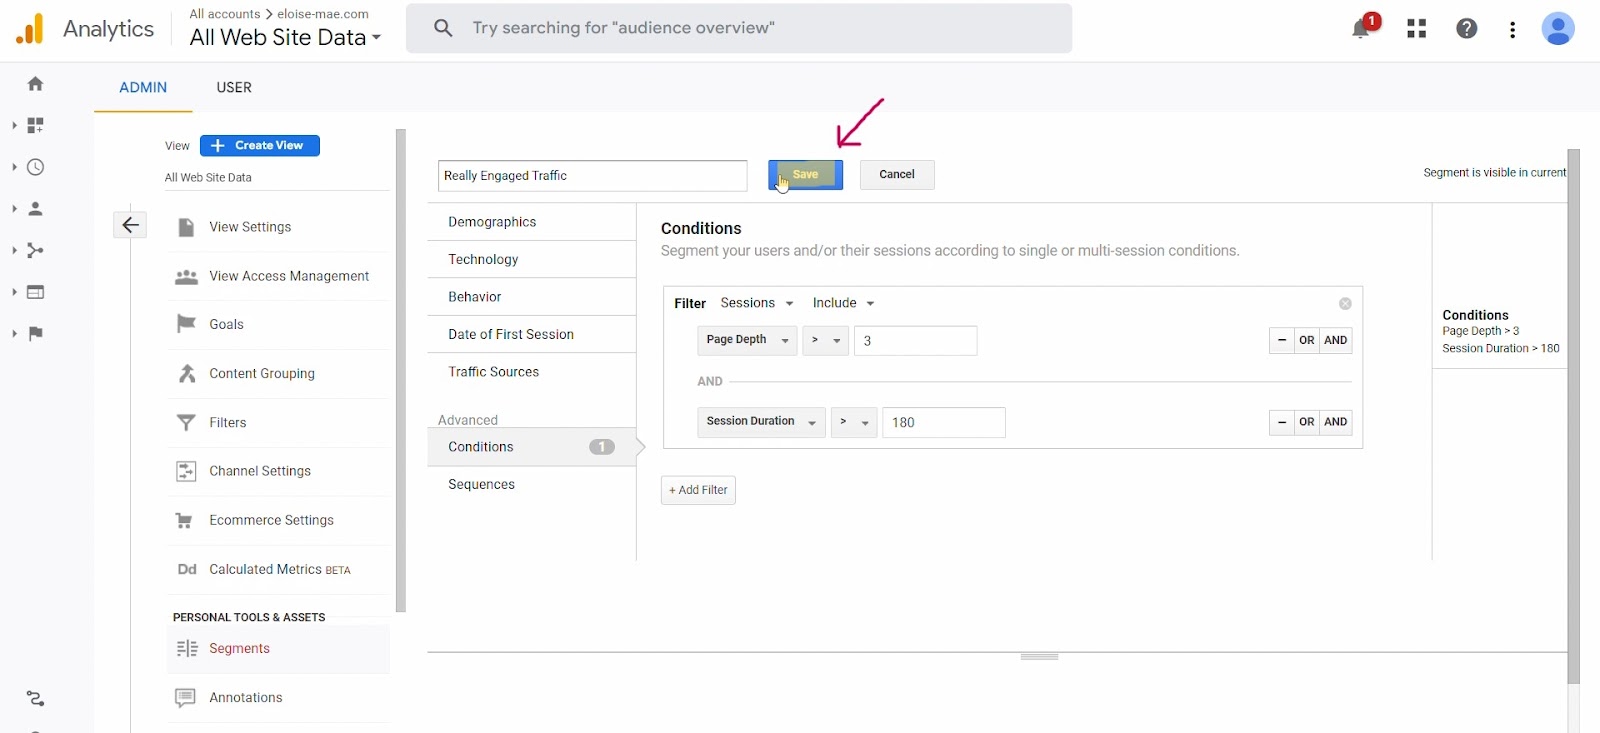
Step 6: Set your conditions based on the options displayed.

On this page, you have options to set conditions based on:
- Demographics (age, gender, language, etc).
- Technology (operating system, device category, browser, etc).
- Behavior (transaction, session duration, etc).
- Date of the user’s first session.
- Traffic sources (campaign, source, etc).
You also have two advanced options:
- Conditions (set for single or multiple sessions).
- Sequences (which allow you to segment according to sequential conditions).
Step 7: Once you’ve set your conditions, name your new segment.

Note: You can also preview your custom segment if you’d like.
Step 8: Finally, save your new custom segment by clicking the “save” button.
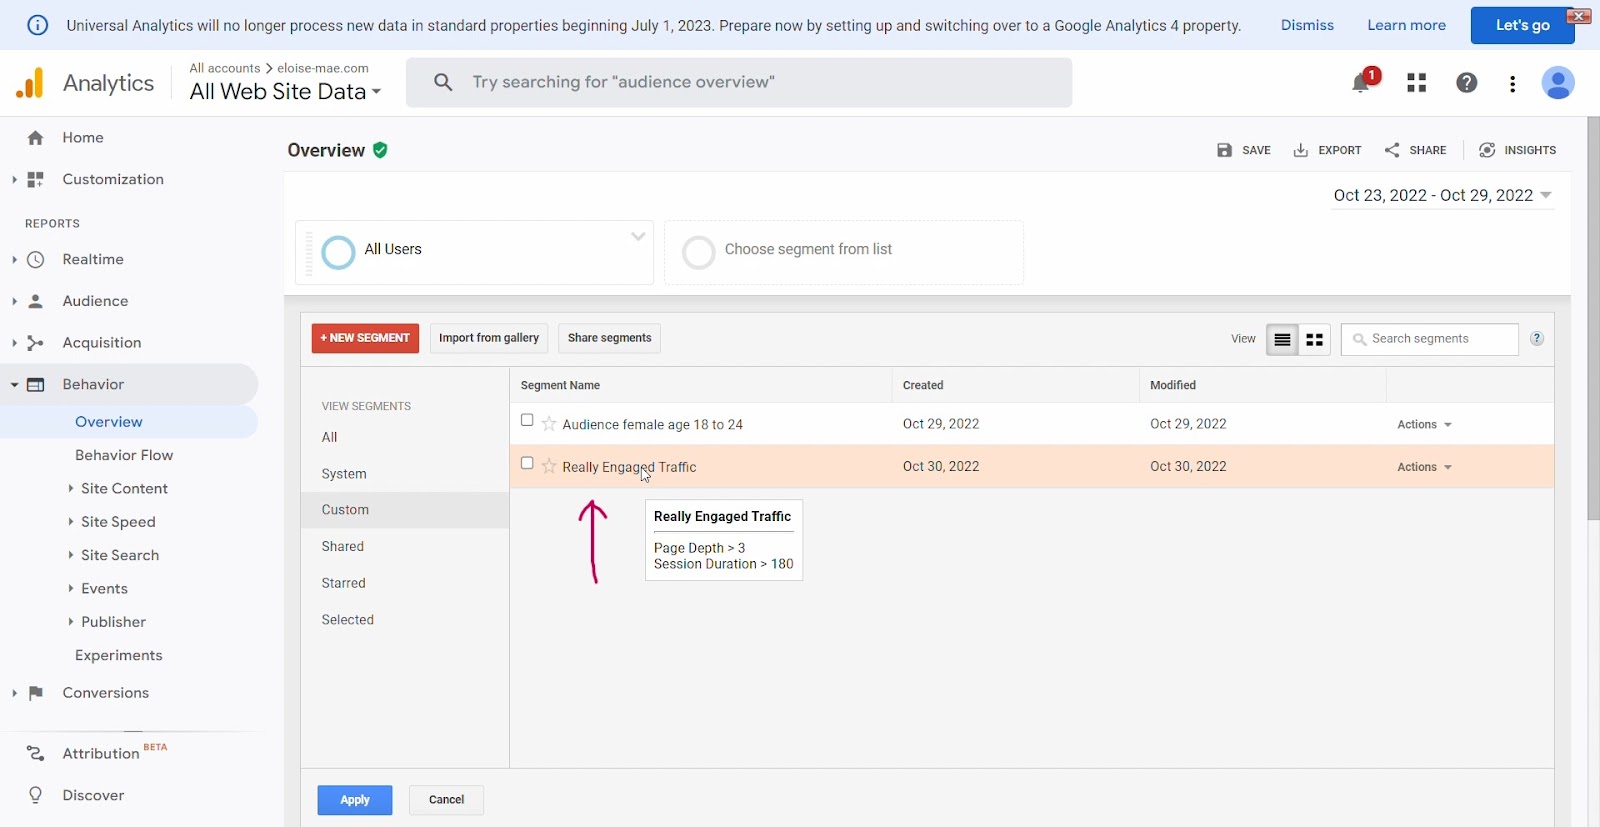
And that’s it.
Your custom segment is ready to go. It should also now appear under “all segments” and “custom segments” on your “add segment” page.

How to Import Segments in Google Analytics from the Analytics Solutions Gallery
Step 1: Login into your Google Analytics account.
Step 2: Navigate to the “reports” section on your dashboard.
Under reports, you have five options:
- Realtime.
- Audience.
- Acquisition.
- Behavior.
- Conversions.
You can import segments in all options listed above. However, for this tutorial, let’s import a segment based on the “behavior” report.
Step 3: Click on “behavior” which will prompt a dropdown menu. From the dropdown menu, click on “overview.”

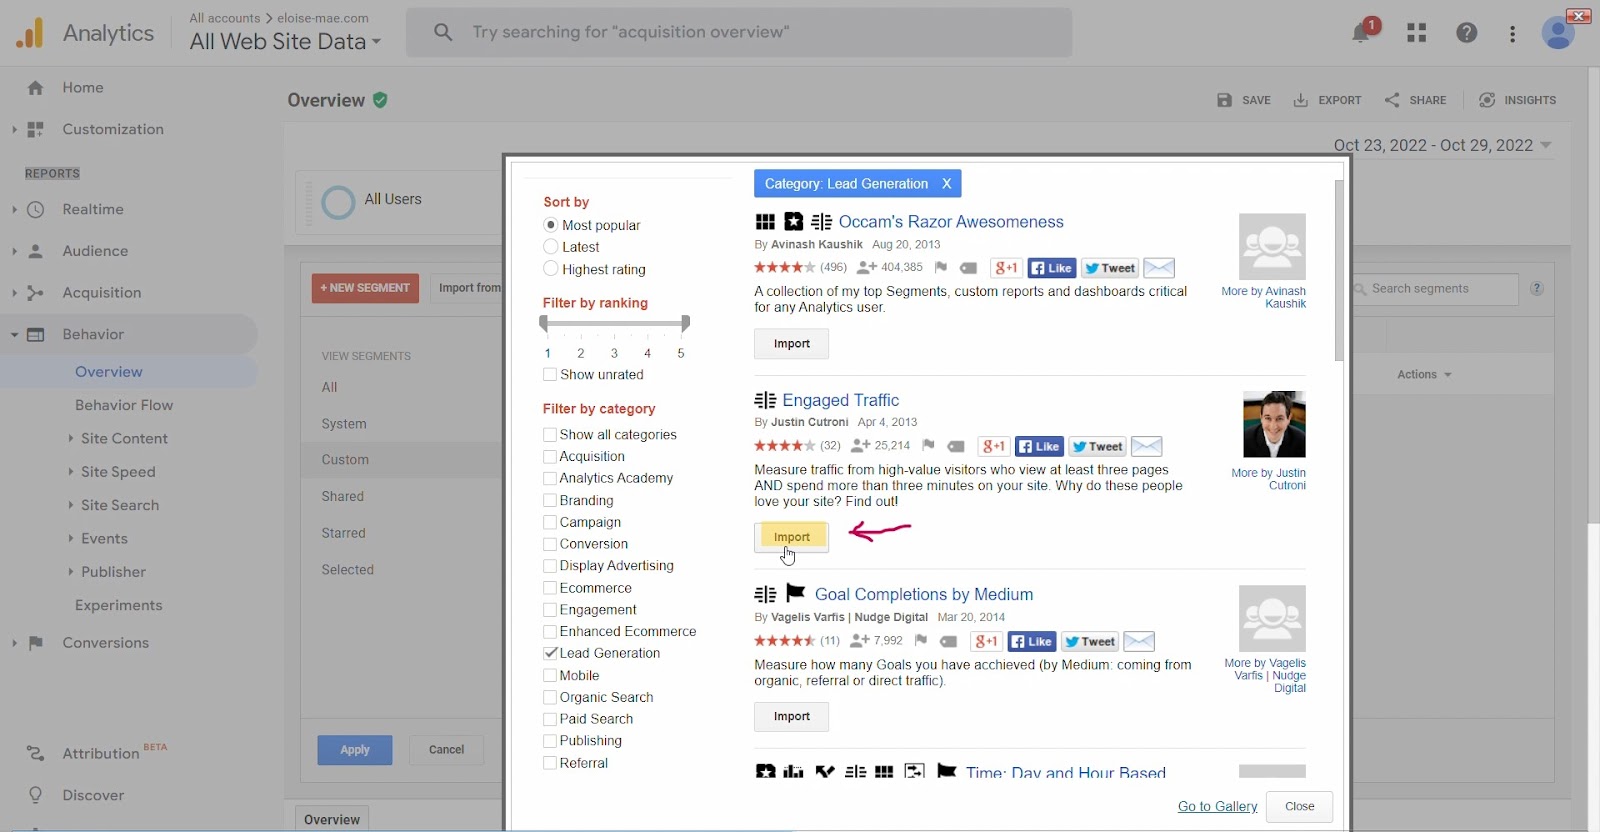
Step 4: Navigate to “Import from gallery” on the Behavior Overview dashboard.

Step 5: Select a segment from the options displayed in the pop-up box.

You can also:
- Sort segments by most popular, latest, and highest rating.
- Sort segments by ranking (between 1 to 5).
- Filter segments by category (acquisition, branding, conversion, etc).
Step 6: Once you’ve found a segment that works for your use case, click “Import.”
Step 7: Next, choose the view you want to import the configuration into and select “create.”
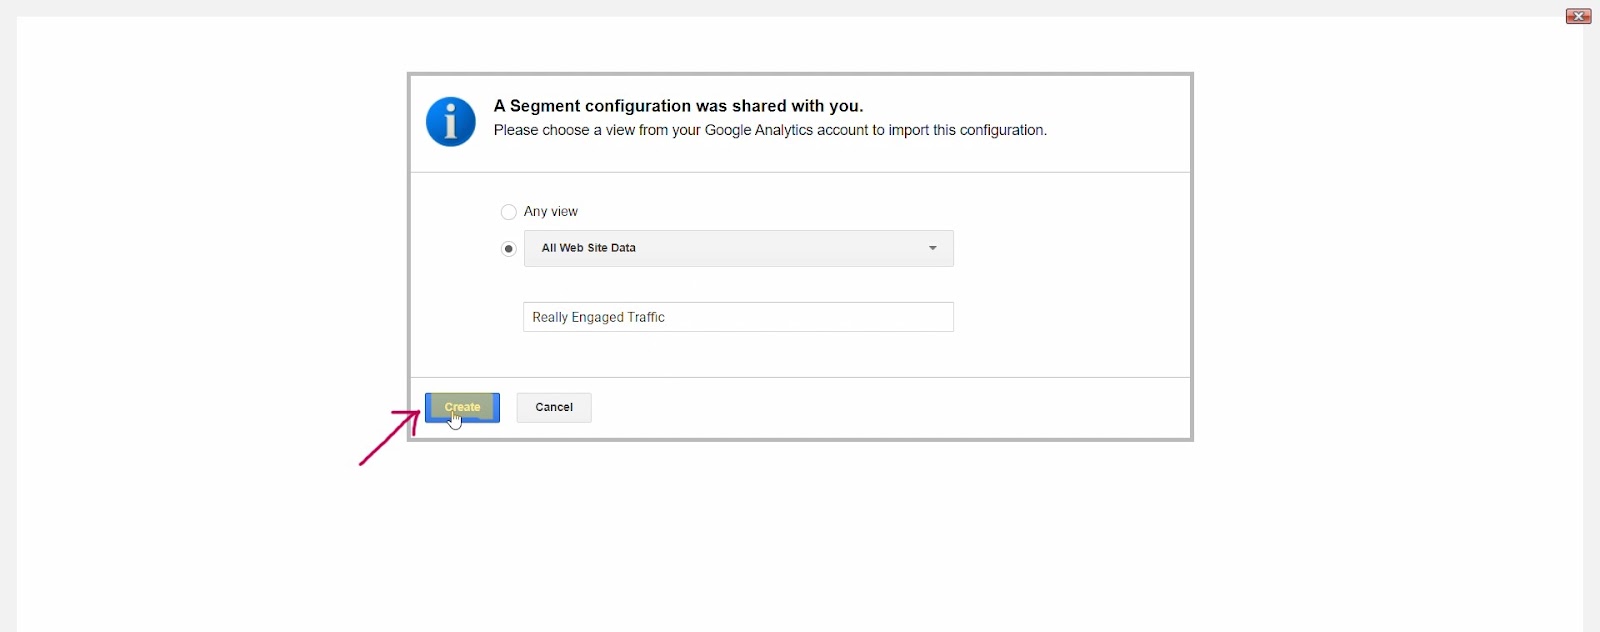
Step 8: That’s it. You’ve imported a segment into your Google Analytics. All that’s left to do is click “save.”
Your newly imported segment should also now appear on your “add segment” page.
Time to Drill Into Your Data
Building and applying segments in Google Analytics will help you get a much more accurate and useful picture of who is visiting your website and what they do once they get there.
Segmentation can help you avoid generalizations, conjecture, and bias. These insights into your audience’s behavior are an invaluable resource that will help you make data-driven decisions.

![]()